
You’ve admired those stout, weathered beams edging paths and raised beds, yet when you start planning your own project the jargon, creosote myths, and weight calculations quickly pile up.
Before you pick up a saw, spend a minute skimming Davids Timber’s collection of reclaimed railway sleepers so you can spot genuine timbers and typical grades.
Reclaimed Sleeper Benefits
Reclaimed railway sleepers carry decades of stories in every knot and scar, giving landscape projects unmatched authenticity while ticking the sustainability box in an undeniably dramatic fashion.
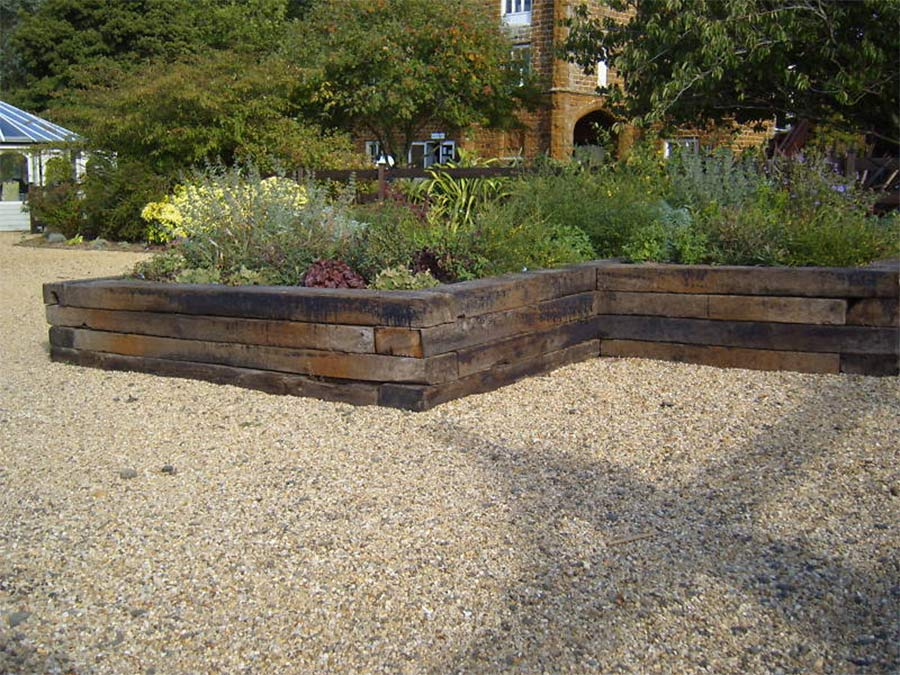
- Historic character: Weathered grain, bolt holes, and iron stains immediately set a scene that brand-new timber can’t imitate, elevating borders, steps, or benches with ready-made patina.
- Hardwood durability: Dense oak or tropical species shrug off Irish rain and wind for years, making the initial lifting effort worthwhile once everything is locked in place.
- Eco-friendly choice: Diverting timber from landfill and reducing demand for fresh felling lightens a project’s carbon footprint and lets clients brag about green credentials.
- Cost balance: While a single reclaimed piece costs more than softwood, its longer lifespan and zero need for additional stains quickly claw back the difference.
- Conversation starter: Visitors inevitably ask where the sleepers came from, giving the garden owner an easy ice-breaker and a built-in piece of living history.
Drawbacks exist—creosote, weight, and limited sizes—yet mindful design minimises those issues. Read a deeper comparison at this Irish guide before committing to a pallet.
Project Planning Essentials
Successful sleeper landscapes start on paper rather than in the mud; mapping levels, drainage, and access prevents last-minute headaches and expensive timber wastage.
Sketch Scale Drawings
Grab grid paper, note existing slopes, utilities, and sun paths, then overlay sleeper modules to see whether standard 2.4-metre lengths fit without awkward offcuts.
Calculate Quantities
Multiply wall length by height, divide by sleeper face area, then add ten percent for mistakes, hidden rot, or spontaneous Saturday-morning inspiration mid-build.
Consider Permits
Retaining walls above one metre, or structures near boundaries, may need permission; checking early avoids nasty compliance letters once neighbours complain.
Timeline And Helpers
List delivery day, excavation, foundations, and fixing sequences. Heavy hardwood needs friends on site, so align calendars before the truck rumbles up.
Cutting And Sizing
Accurate cuts create tight joints, pleasing geometry, and professional finishes; rushing here guarantees frustrating gaps that collect water and invite rot later.
Mark Twice, Cut Once
Use a speed square and thick carpenter’s pencil on all sides, ensuring the line remains visible even after sawdust clouds your view mid-cut.
Choose The Right Blade
Carbide teeth rated for nail-embedded timber reduce sparks and kickback, extending blade life when an old dog-spike surprises your circular saw.
Flip-Cut Technique
Most blades won’t reach 200 mm depth, so slice along guides, roll the sleeper, align kerfs, and finish with a handsaw or reciprocating saw.
Sanding Edges
A quick pass with 40-grit paper removes splinters, reduces injury risk, and helps stains penetrate evenly across fresh, thirsty end grain.
Treatment And Protection
Keeping sleepers sound and safe hinges on smart treatment choices matched to timber species, intended use, and local climate variations.
Understanding Creosote
Old sleepers soaked in creosote resist rot yet release oily residues in heat; avoid contact areas like benches or vegetable beds to stay compliant.
Modern Pressure Treatments
Softwood sleepers impregnated with Tanalith-E offer reliable rot resistance without carcinogenic concerns, making them ideal for family-friendly raised gardens.
Natural Durable Hardwoods
Jarrah, azobé, and dense oak often require no chemicals; occasional linseed-based oiling slows greying while letting the timber breathe naturally.
Surface Sealers
Clear wax-oil blends block moisture pathways, inhibit fungal spores, and highlight grain; apply annually on sun-exposed faces for showroom sparkle.
Ground Preparation Steps
Stable foundations decide whether a sleeper wall stands proud for decades or slumps after one savage winter downpour.
- Excavate trench: Dig 150 mm deeper and wider than sleeper thickness, removing roots and soft soil to reach undisturbed sub-base.
- Add hardcore: Compact 75 mm of crushed stone for drainage and to distribute weight evenly across the project footprint.
- Level with sand: Screed a 25 mm coarse sand layer, allowing micro-adjustments that achieve crisp, spirit-level perfection before timber lands.
- Install weed membrane: Lay permeable fabric up the sides, preventing nettles or couch grass pushing joints apart in later years.
- Check alignment: Stake string lines front and back, measuring diagonals to confirm square corners before committing to heavy fixings.
Careful prep might feel laborious, yet it saves re-levelling headaches, ensures drainage, and protects adjacent paving from frost heave damage.
Secure Sleeper Installation
Fastening methods vary with wall height, load, and aesthetic preference; choose a system, then apply it consistently for structural integrity.
Rebar Pinning
Drill 14 mm holes, hammer steel rods through stacked sleepers into concrete, locking courses together and anchoring the structure to the sub-soil.
Long Timber Screws
Counter-sink 200–250 mm exterior screws at staggered angles, pulling faces tight without visible brackets, perfect for clean modern lines.
H-Beam Posts
Slide sleepers into galvanised steel channels set in concrete; this method excels on tall retaining walls needing engineered lateral strength.
Corner Bracing
Galvanised L-plates inside corners prevent twisting forces, especially where foot traffic or soil pressure constantly flexes the timber frame.
Popular Garden Projects
Railway sleepers unlock countless design possibilities, limited only by imagination and available muscle on installation day.
Raised Vegetable Beds
Stack two softwood courses high, line with membrane, and fill with rich loam for ergonomic, slug-resistant growing that children can easily reach.
Garden Steps
Cut treads to 900 mm, pack underneath with compacted Type 1, and secure risers with rebar for rustic, non-slip access up terraced banks.
Outdoor Seating
Bolt three sleepers side-by-side for a minimalist bench; add backrests by fixing upright off-cuts, then sand edges until splinter-safe.
Water Features
Create a koi pond frame, line with EPDM, and let weathered faces contrast beautifully against reflective water and lush marginal planting.
Maintenance For Longevity
A few seasonal habits keep reclaimed sleepers handsome and structurally sound long after neighbouring fences require replacement.
- Annual inspection: Walk the perimeter, tapping for hollow sounds and checking fixings haven’t loosened under freeze-thaw cycles.
- Clean surfaces: Brush off algae with stiff nylon bristles and mild detergent, preventing slippery film and decay-encouraging moisture pockets.
- Re-oil hardwoods: Apply UV-resistant penetrating oil every two summers to nourish fibres and slow the attractive silvering process.
- Top-up gravel drains: Settlement may expose lower timber edges; refill gaps so splash-back water can freely soak away.
- Control vegetation: Prune ivy or brambles early—their roots exploit micro-cracks, accelerating rot and staining surrounding paving.
Commit to these quick tasks each spring and autumn, and the sleeper installation will look freshly finished—without major renovation—for at least two decades.
Last Checks
Review each step before lifting a single sleeper. Confirm dimensions, ground levels, and treatment dryness. Verify you have fixings, safety gear, and disposal plans. Lay trial positions, adjust, then commit. Inspect installations annually, recoat when grain dulls, and replace failed pins. Your foresight keeps every timber stable for lasting strength.