

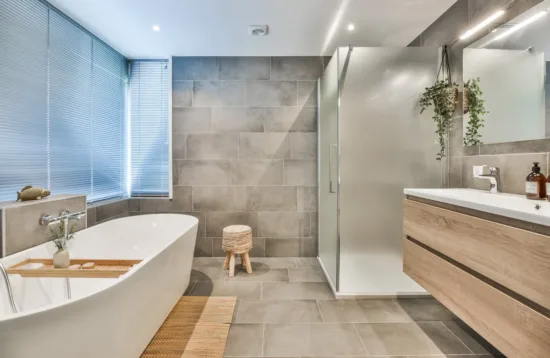
Renovating a bathroom can be an exciting yet daunting process. One of the most common questions Brisbane homeowners ask us is: How long will it take? The answer depends on the scope of work, the complexity of the design, and the availability of materials and tradespeople. In this guide, we’ll walk you through each major stage of a bathroom renovation, what happens during that phase, and the typical time frame for each step.
1. Planning and Design (1–2 weeks)
Before any physical work begins, the planning and design stage lays the foundation for your renovation. During this phase, you’ll work with a bathroom designer or contractor to finalize the layout, choose materials, and create a detailed plan.
- Key tasks include:
- Measuring the space and creating a design plan.
- Selecting tiles, fixtures, and fittings.
- Obtaining necessary permits (if required).
It’s important to allocate time to make informed decisions and account for delivery times on any custom orders. For example, companies offering bathroom renovation services can assist in creating tailored designs while ensuring local compliance.
2. Demolition and Preparation (1–2 days)
Once planning is complete, the next step is to strip the existing bathroom. This involves removing old tiles, fixtures, cabinetry, and potentially demolishing walls if the layout is being altered.
- Key tasks include:
- Disconnecting plumbing and electrical systems.
- Safely removing all old materials.
This stage is quick but messy, so ensure proper disposal methods are in place. Hiring professionals experienced in demolition and construction can streamline the process, especially if significant structural changes are involved.
3. Structural Changes and Framing – Optional (2–5 days)
If the renovation involves moving walls, adding windows, or reinforcing flooring, this stage comes next. Structural changes might extend the timeline, especially if significant adjustments are needed. If the renovation is purely cosmetic this step may not be necessary.
- Key tasks include:
- Constructing new walls or partitions.
- Ensuring the subfloor is level and prepared for tiling.
This phase ensures the space is ready for the finishing stages and prevents future problems, such as leaks or uneven tiles.
4. Rough-In Plumbing and Electrical (1-2 days)
After demolition, the plumbing and electrical systems are updated to match the new layout. This stage is critical to ensure the bathroom functions correctly and safely.
- Key tasks include:
- Relocating or installing new pipes for sinks, showers, and toilets.
- Updating wiring for lighting, exhaust fans, and other electrical needs.
An inspection may be required to ensure the work complies with local building codes. Delays can occur if issues like outdated plumbing or electrical systems are discovered.
5. Resheeting the Walls (1–2 days)
After plumbing and electrical work is complete, the walls are resheeted using moisture-resistant materials such as plasterboard or cement board. This step creates a smooth surface for waterproofing and tiling.
- Key tasks include:
- Securing plasterboard or similar materials to the wall frames.
- Ensuring surfaces are even and ready for finishing.
This stage is straightforward and usually completed quickly.
6. Waterproofing (2–3 days)
Waterproofing is an essential step to protect your bathroom from water damage. A certified professional applies a waterproof membrane to areas such as the shower, walls, and floor.
- Key tasks include:
- Applying multiple layers of waterproofing membrane.
- Allowing sufficient drying time between coats.
Skipping or rushing this stage can lead to costly repairs down the line, so ensure it’s done thoroughly.
7. Tiling and Flooring (3-5 days)
Once waterproofing is complete, tiling and flooring installation begins. This is often the most time-consuming stage due to the precision required. That’s why it’s paramount to work with a reputable builder or if you’re coordinating the renovation yourself to make sure you hire a reputable Brisbane Tiler.
- Key tasks include:
- Laying tiles on floors and walls.
- Grouting and sealing tiles to ensure durability.
Complex patterns or premium materials like natural stone can extend the timeline. It’s worth the extra time to ensure a flawless finish.
8. Fixture Installation (1-2 days)
With tiling done, the next step is to install new fixtures such as the bathtub, vanity, toilet, and showerhead.
- Key tasks include:
- Connecting plumbing fixtures and testing for leaks.
- Installing lighting power outlets and ventilation systems.
This stage is where your vision starts coming to life, slowly transforming the space into a functional bathroom.
9. Painting and Finishing Touches (2–4 days)
The final step involves painting the walls, touching up trims, and adding accessories like towel rails and soap holders.
- Key tasks include:
- Painting walls with moisture-resistant paint.
- Installing decorative elements and hardware.
Finishing touches might also include a final deep clean to prepare the bathroom for use.
Estimated Total Time Frame
For a standard bathroom renovation, you can expect the process to take 4–6 weeks from start to finish. However, larger projects or those involving custom features may take longer. Here’s a quick breakdown of the timeline:
Final Thoughts
While the timeline for a bathroom renovation can vary, careful planning and hiring experienced professional bathroom renovators can minimise delays. With an impressive average turnaround of 2 weeks after the design phase Bathroom Renovators Brisbane provide customised high quality bathroom renovations Brisbane homeowners can count on to be completed on time and on budget.
If you’re ready to start your renovation, take the time to plan each stage carefully, and remember: a well-executed bathroom renovation is worth the wait!