
Why Paint by Numbers is Your Perfect Living Room Makeover Solution
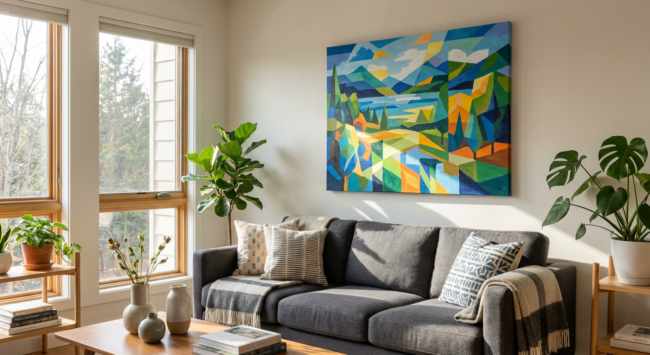
Staring at blank walls day after day drains the energy from any living space. Your living room deserves better than generic posters or that empty spot above the couch. The good news? Creating stunning, personalized DIY wall art doesn’t require any painting experience or a massive budget. Paint by numbers delivers the perfect middle ground between creative expression and foolproof results that look professionally crafted.
This approach solves the exact challenges that stop most people from decorating confidently. You want unique pieces that reflect your style, but custom commissions cost hundreds of dollars. You love the idea of handmade touches, but worry you’ll mess up and waste money on supplies.
Paint by numbers eliminates these concerns completely:
- Budget-friendly pricing compared to gallery artwork or designer prints
- No artistic skills needed since the template guides every color placement
- Reversible commitment because you’re investing time more than huge sums
- Personalized results that tell a story mass-produced decor never can
This weekend project breaks down into manageable sessions. You’ll follow clearly marked sections that remove all guesswork, building confidence with each completed area. The finished piece genuinely impresses visitors while giving you that satisfying feeling of accomplishment every time you walk past it.
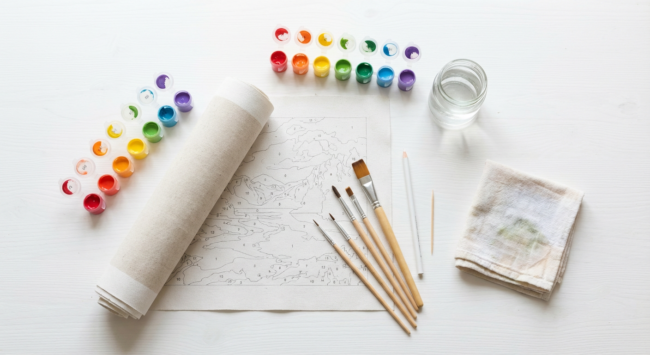
Complete paint by numbers supplies laid out on workspace including canvas, paints, brushes, and helpful tools
Essential Supplies You’ll Need for Your Weekend Project
Getting started with paint by numbers is exciting, and having the right supplies makes all the difference between a frustrating experience and an enjoyable weekend project. Your basic kit includes a pre-numbered canvas, matched acrylic paints, and several brush sizes, but a few smart additions will elevate your results significantly.
Set up a comfortable workspace with proper lighting (natural daylight works best) and protective covering for your table. You’ll need a water container for rinsing brushes and plenty of paper towels within arm’s reach. Here’s a pro tip: keep a damp cloth and toothpick nearby while painting. The cloth prevents dried paint buildup on brush tips that causes streaky coverage, while the toothpick is perfect for scraping away paint that accidentally crosses into neighboring sections, giving your finished piece the crisp, professional look that makes it worthy of being your living room centerpiece.
For detailed sections, consider these helpful additions:
- Magnifying glass for tiny numbered areas
- White pencil or chalk for marking unclear sections (this subtle outline helps you navigate complex areas without confusion, especially where numbers are faint)
- Small easel to angle your canvas for better visibility
Finally, browse frame options early. Choosing your frame ahead of time keeps you motivated and ensures your finished artwork perfectly matches your living room décor.
Your Step-by-Step Weekend Painting Timeline
Begin your weekend by preparing your workspace properly. Find a flat surface with good lighting, preferably near a window for natural light. Unroll your canvas carefully and let it rest flat for 30 minutes if it has any curling from storage. Note that quality kits like those from Davincified ship canvases in protective tubes to ensure they arrive flat and damage-free, making the setup process smoother.
Organize your supplies before you start painting:
- Arrange paint pots in numerical order
- Fill a cup with clean water for rinsing brushes
- Keep paper towels nearby for quick cleanups
Start with larger sections and darker colors first. This approach helps you cover more canvas quickly and builds momentum. Work in focused 45-60 minute sessions, then take a 10-minute break to rest your eyes and stretch your hands.
Plan for multiple weekends if needed. Many painters don’t finish complex pieces in just two days, and that’s perfectly normal. Think of it as an ongoing project rather than a race. Use Sunday for detailed work on smaller numbered areas where your hand will be steadier after Saturday’s practice. Complete what you can comfortably accomplish, then store your supplies properly for next weekend. When you do finish, let your piece dry for 2-3 hours before framing for a beautiful living room display.
Pro Techniques That Elevate Your Finished Piece
Mastering a few professional techniques makes the difference between a hobby-level piece and something worthy of framing. Start with proper paint loading by dipping only the tip of your brush, not the entire bristle, which prevents paint from seeping into the ferrule and ruining your brush. Work in consistent directions within each numbered section, using smooth strokes that follow the natural flow of the subject rather than random dabbing.
The two thin coats method delivers far superior results compared to globbing on thick paint. Your first coat establishes color, while the second brings depth and eliminates any canvas showing through. Premium paint by numbers brands like Davincified are known for providing high-pigment acrylic paints that require fewer coats for full coverage, which significantly speeds up your weekend timeline.
For color transitions, slightly overlap adjacent sections while the paint is still tacky to create natural blending. This eliminates those harsh, paint-by-numbers lines that scream “beginner work.”
When tackling intricate areas, rest your painting hand on your non-dominant hand to create a stable bridge. Work under bright, natural light when possible, and consider an inexpensive magnifying lamp for tiny details. Clean your brush thoroughly between every color switch to prevent muddy tones that dull your finished piece.
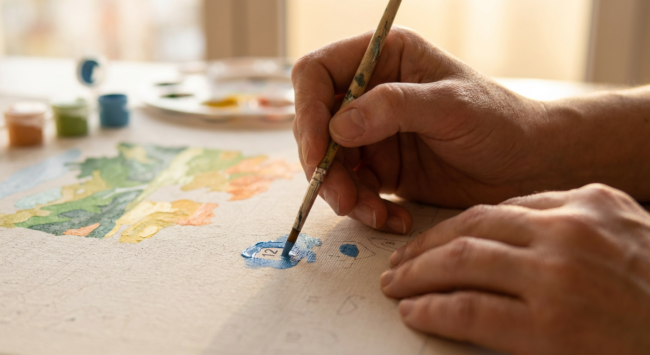
Close-up of proper brush technique while painting numbered sections on a paint by numbers canvas
Styling Your Completed Artwork in Your Living Room
Your completed paint by numbers canvas deserves thoughtful presentation to truly shine in your living room. Start by selecting a frame that matches your interior style. Floating frames work beautifully for modern spaces, giving your artwork a gallery-quality appearance by suspending the canvas within the frame. For traditional rooms, classic wooden frames with subtle matting create an elegant, timeless look.
Consider starting with statement pieces from collections specifically curated for living spaces, as experts at Davincified recommend choosing subjects that complement rather than clash with your existing color scheme.
Placement makes all the difference. The wall above your sofa is prime real estate, positioning your artwork as the room’s focal point at eye level . If you’re creating a gallery wall, your paint by numbers piece can anchor the arrangement alongside family photos and other artwork.
For larger walls, consider displaying multiple canvases as a series. Triptychs (three-panel arrangements) add visual drama and can stretch across wider spaces. When hanging multiple pieces, maintain 2-3 inches of spacing between frames for a cohesive look.
From Blank Wall to Gallery-Worthy in 48 Hours
Picture this: you started Friday evening staring at a numbered canvas, maybe feeling a bit uncertain. Now it’s Sunday afternoon, and you’re stepping back to admire a stunning piece of original artwork hanging on your living room wall. That’s the magic of a weekend paint by numbers project.
The best part? You’ve created gallery-quality art for a fraction of what you’d spend at a home décor store. While similar pieces might cost $200-500 ready-made, you’ve achieved the same visual impact for under $50. Plus, you have the added bonus of telling guests, “Actually, I painted that myself.”
Once you experience how satisfying that first completed canvas feels, you’ll likely find yourself browsing for your next project. That empty hallway? The guest bedroom? Your home office? Each space becomes an opportunity to add personalized artwork that reflects your taste, not just what was available at the furniture store.
The only question left is: which room will you transform next?