
If you’re giving your bathroom a makeover—or building one from scratch—deciding on a shower kit can be a real game-changer. These all-in-one packages make things easier, faster, and a lot less stressful than designing a custom shower from the ground up.
This guide walks you through everything you need to know: from the types of shower kits out there, to the materials they’re made of, how to install them, and how to keep them looking new for years.
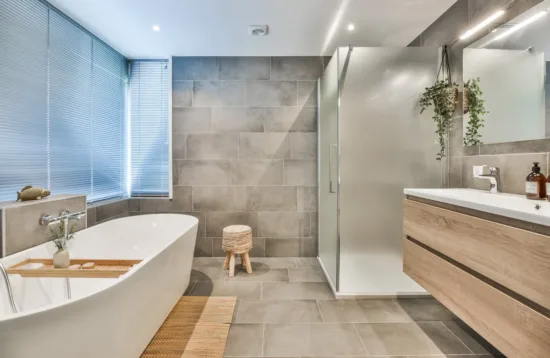
What Is a Shower Kit?
A shower kit is basically a pre-assembled bundle of the essential parts you need to build a functioning shower. You’ll usually find:
- A shower base or pan (the floor of the shower)
- Wall panels that surround the space
- A door or enclosure
- Sometimes even fixtures like the showerhead and controls
The appeal? Everything is designed to work together, so you’re not hunting down pieces that may or may not fit. It saves time, reduces headaches, and helps avoid costly mistakes.
Types of Shower Kits
Depending on your bathroom layout and how much space you’ve got to work with, there are several types of shower kits to choose from.
Alcove Shower Kits
These are made to fit into three-sided spaces. If your bathroom already has a natural alcove, this type is usually the easiest option.
Corner Shower Kits
Tight on space? A corner kit could be the way to go. It fits neatly into a corner, freeing up room for other things without feeling cramped.
Neo-Angle Shower Kits
These kits give you a sleek, angled design—usually with a door that cuts across the corner. They save space and offer a more modern look.
Walk-In Shower Kits
Walk-in kits have no step or threshold at the entry, which is great for accessibility or just for a clean, minimalist vibe.
ADA-Compliant / Barrier-Free Shower Kits
These are built with accessibility in mind. You’ll find features like low thresholds, support bar options, and built-in seating to make things safer and easier for those with mobility challenges.
One-Piece vs. Multi-Piece Kits
- One-piece kits are molded as a single unit, which gives you a seamless finish but can be tricky to fit through narrow hallways or doors.
- Multi-piece kits come in sections, making them easier to maneuver and ideal for renovations.
Breaking Down the Parts of a Shower Kit
Each component in a kit has its own purpose, and understanding them will help you know what to expect.
Shower Base or Pan
This is the bottom part of your shower. It needs to be sturdy, slip-resistant, and properly sloped so water drains the way it should.
Wall Panels
The walls form the enclosure. Depending on the material, they might be smooth, textured, tiled, or stone-look. Some even come with built-in shelves or ledges for shampoo and soap.
Doors and Enclosures
You’ve got a few choices here:
- Sliding doors are great for saving space.
- Swinging (pivot) doors give a more traditional feel.
- Bi-fold doors are a smart pick for very tight spots.
Fixtures and Controls
Some kits include things like a showerhead, valve, or temperature control. If they don’t, you’ll have the freedom to choose your own.
Materials You’ll Commonly See
The materials used in shower kits play a big role in how they look, feel, and hold up over time.
Acrylic
Lightweight, easy to clean, and resistant to mold. Acrylic kits are popular because they balance cost and durability.
Fiberglass
One of the most affordable options. It’s light and easy to install, though it can show wear a bit sooner than other materials.
Solid Surface
These kits have a high-end look and feel, often mimicking stone. They’re durable, seamless, and super easy to keep clean.
Composite or Engineered Stone
These combine the aesthetics of natural stone with a lower-maintenance, more uniform finish.
Tempered Glass
Used mainly for doors and enclosures, tempered glass is strong and safe. If it ever breaks, it shatters into small, dull pieces rather than sharp shards.
How to Pick the Right Shower Kit
There’s no one-size-fits-all answer here, but these factors can help guide your decision.
Measure Twice, Buy Once
Start with your bathroom’s dimensions. Consider where plumbing lines run and how much clearance you’ll need for doors to swing open or slide.
Match the Look
Make sure the kit you pick fits the overall aesthetic of your bathroom. Do you want modern and minimalist, classic and cozy, or somewhere in between?
Think Accessibility
Need something easy to step into? Go with a walk-in or barrier-free option. Adding a bench or grab bars can make a big difference for long-term usability.
Don’t Forget Ventilation
Even the best materials can suffer if your bathroom doesn’t have enough airflow. Good ventilation keeps mold and mildew at bay and extends the life of your shower.
What to Know About Installation
Shower kits are built for easier installation—but that doesn’t mean it’s foolproof. Here’s what to keep in mind.
Before You Start
- Make sure the subfloor is level and sturdy.
- Check that your plumbing is compatible with the new setup.
- Read all the instructions before tearing out the old shower.
DIY vs. Hiring a Pro
Some kits are totally DIY-friendly. Others, especially those with complicated plumbing or custom fittings, might be better left to a professional.
Common Mistakes to Avoid
- Rushing the waterproofing step
- Using the wrong type of caulk or adhesive
- Forgetting to test fit everything before sealing it up
Time Commitment
You could finish a basic kit over a weekend, but give yourself wiggle room—especially if it’s your first time.
Making the Most of a Small Bathroom
You don’t need a big footprint to have a great shower. Here are some design tricks:
- Use glass doors to keep things feeling open.
- Pick a corner or neo-angle unit to free up floor space.
- Choose wall panels with built-in storage to avoid clutter.
Waterproofing & Sealing Tips
This part is non-negotiable if you want your shower to last.
- Use a mold-resistant silicone caulk on all seams and joints.
- Install moisture barriers behind wall panels if your kit doesn’t include them.
- Ensure the base is correctly sloped toward the drain.
Check caulk lines annually and reapply if you notice cracks or gaps.
Keeping Your Shower Kit in Top Shape
Cleaning by Material
- Acrylic & fiberglass: Use a mild cleaner and soft sponge—nothing abrasive.
- Glass: Wipe it down after each use to prevent water spots. Vinegar works well for mineral deposits.
- Solid surfaces: Gentle soap and water usually do the trick. For stubborn spots, try a non-scratch scrub pad.
Preventing Mold and Mildew
- Keep the fan running or window cracked during and after showers.
- Wipe down wet areas so moisture doesn’t linger.
- Inspect seals and corners regularly for signs of mold.
Long-Term Upkeep
- Tighten any loose fixtures.
- Replace caulk as needed.
- Clean showerheads to prevent clogs and mineral buildup.
Pros and Cons of Using a Shower Kit
What’s Great
- Everything matches and fits together.
- You don’t have to chase down parts.
- Most kits are faster and easier to install than custom showers.
What to Consider
- You’ll have fewer layout and size options than a fully custom build.
- Materials in kits can vary—some are more durable than others.
- You might need to adapt your space a bit if your bathroom is older or oddly shaped.
Eco-Friendly Features to Look For
- Choose low-VOC or recyclable materials where possible.
- Pair your kit with a water-saving showerhead to cut down on usage.
- Invest in quality—something that lasts longer means less waste in the long run.
Safety Features That Matter
Whether you’re planning for now or thinking ahead, it’s smart to consider safety from the start.
- Slip-resistant bases can prevent falls.
- Look for reinforced areas where grab bars can be installed.
- Consider kits with built-in seating for comfort and accessibility.
- Low-threshold entries are easier to step into and out of.
What’s Trending in Shower Design
Bathrooms are getting more stylish than ever. Here’s what’s hot right now:
- Frameless glass doors for a clean, open feel
- Matte black or brushed brass fixtures
- Oversized wall panels that look like stone or tile, but without the grout
- Digital controls that remember your favorite temperature
- Integrated lighting for a spa-like vibe
Main Takeaways
- A shower kit simplifies your renovation by bundling all the essentials into one easy-to-install solution.
- The right kit depends on your space, your needs, and your style.
- Material choice matters—for both looks and longevity.
- A solid installation and routine maintenance can keep your shower looking brand new for years.
- Today’s kits are more flexible, stylish, and accessible than ever before.
Frequently Asked Questions
Can I install a shower kit myself?
Yes, many kits are designed for DIY installation. Just make sure you’re comfortable with basic plumbing and sealing techniques.
How long does it take?
A straightforward install can take a weekend. Add a little extra time if you’re redoing plumbing or leveling the floor.
Which material is the most durable?
Solid surface or engineered stone tends to last the longest. Acrylic is a good middle-ground—durable and budget-friendly.
Do I need a one-piece or multi-piece kit?
If you’re renovating an existing space, multi-piece kits are easier to fit through doors and tight hallways. One-piece kits are best for new construction.
How do I keep the seals waterproof?
Inspect and reapply caulk regularly. Keep your shower dry when not in use, and make sure everything’s ventilated.