

Constructing a DIY Murphy bed will free up floor space and provide overnight visitors with a cozy, simple place. Murphy or exterior beds fold either against the wall or inside a cabinet. They are space-saving furnishings.
No doubt, construction for less than $1,000, these Murphy bed designs have USB ports that consume the lights, electricity plugs, and a Murphy bed hardware kit. Murphy bed kits run in identical twins, full monarch, and king sizes, so assembling a Murphy yourself is simpler than ever.
Let’s dive deeper into how you can create a Murphy bed for your home. And how to make your own Murphy bed that costs only a few bucks. Given below are some simple steps to go with
What is the cost of a DIY Murphy bed?
Murphy bed construction is far less expensive than purchase. A Murphy bed can save you over $3,000; luxury models run around $10,000. For a Murphy bed, materials like solid wood and plywood will just run for a few hundred dollars. Should you choose to apply a Murphy bed hardware kit like this one, you should budget an additional few hundred bucks.
Some DIYs choose to forego the Murphy bed hardware kits while creating a Murphy bed to cut some costs. However, you need specific tools and materials for a DIY Murphy bed.
Simple techniques to build a Murphy bed
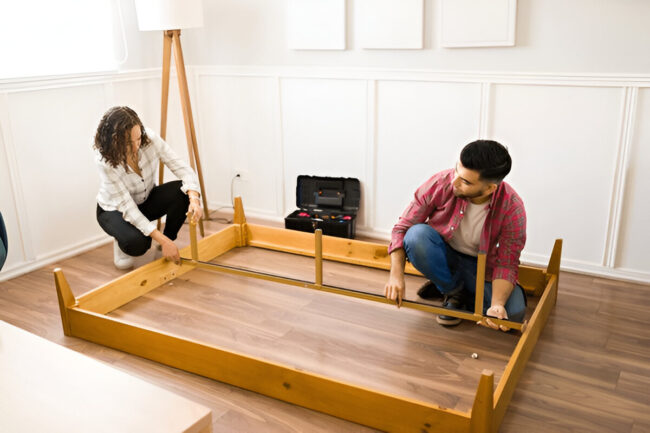
Creating a DIY Murphy bed is relatively easy; however, there are some simple techniques that you can follow. Cut two boards measuring 1 x 8 inches and two measuring 2 x 2 inches to 75 inches.
Attach the middle assistance.
Trim a 2×4 to 75-inch length, then concentrate it in the exact center of the box. This extends from top to bottom, 28-1/4 inches centered. Switch screws into the 1×6 boards and the 2×4 finishes.
Pivot Mechanism Mounted
You can follow the already-designed Murphy bed templates to execute the pivots. Moreover, simply mount the hardware for springs and pistons. Furthermore, use this for the upper end of the base.
The cabinet’s measurement
simply uses the hardware kit. Take the cabinet measurements and follow the mattress width as a template.
Use the hardware kit’s measurements for your wall cabinet and your mattress’s thickness as a guide. However, you can follow some essential tips as well.
A pivot mechanism gap exists. The space between the inside of the wall cabinet and the exterior of the mattress box constitutes the necessary gap of the pivot mechanism. The gap will decide the board lengths from top to bottom to guarantee that the hardware has space.
Cabinet height
The height to which hardware is mounted. Since the entire cabinet height needs to accommodate the whole length of the bed box when closed, the height of your sides will be determined by the elevation of the pivot mechanisms from the floor.—one side of a bed.
Because the cabinet must be deep enough to accommodate the mattress when closed, the dimension of your cushion will determine the required measurement of the compartment. The following actions are for demonstrative purposes: pretending the cabinet’s necessary internal height is 80 inches, internal width is 60 inches, and internal depth is 13 inches. Change these measurements as required.
Cutting Wood for Cabinet Walls

Using a circular saw or straight-edge table, cut the 3/4-inch hardwood in half, resulting in 15 by 80-inch sides. Slice another piece, this time measuring 61 1/2 by 15 inches. Chop four 2x4s into lengths of 60 inches.
Before fastening a 2×4 to the wall, pre-drill it and secure it 80 inches from the top edge using lag bolts that are 1/4 inch by 3-1/2 inches with washers. Then, fasten two 2x4s together to the floor and the wall.
Place the tallest piece on either side with the bottom piece facing out. Fasten the centerpiece to the edges of the side pieces using wood screws of 2-inch. Cut two pieces of 1/4-inch material: one 60 by 48 inches long and another 20 by 60 inches.
Mount optional Recessed Outlet and Reading Light
Mount the reading light and recessed outlet to use a covered outlet. Cut the outlet hole at least two inches below the top edge of the 20-inch-tall plywood piece. Measure and cut the hole according to the manufacturer’s directions. Distribute the reading lamps and electrical outlets evenly at the four corners of the 1/4-inch MDF board. Set Up the Rear Parts
Insert the plywood into the cabinet sides after you’ve glued each 2×4 and 2×2. Use brad nails to secure it. Place the higher piece first and then the bottom one. Left purposefully free across its bottom edge, the bottom piece provides access to the covered outlet.
Mount Bed Box within Wall Cabinet
Mount the bed box inside the wall cabinet and fasten the pivot mechanism per the manufacturer’s directions. Test the bed’s operation by lifting and lowering it; make any necessary changes before continuing.
Cut half-inch plywood into two 30-inch by 76-1/2-inch sections. Glue and bread-nail the parts on the front of the bed box with the bed closed.
Create Door Pulls
Drill holes and use the given hardware to attach door pulls, therefore enhancing the appearance of the faux cabinet door. Add the nuts to the rear side to quickly lower the bed. These also provide a solid spot to grab, facilitating the lowering of the bed.
After the bed has been put safely back in place, use a 1×6 piece of trim on the top and at the bottom to hide the existing interior of the cabinet.
Things to keep in mind
Select the kind of wood that will suit your budget and vision. Use this default if the Murphy bed hardware kit calls for a particular type.
Including built-in cabinets.
If you invest time in making a cabinet to hide your Murphy bed, you could go one step further and create other cabinets for added storage. The Murphy bed cabinet will be decorated with a basic set of DIY floor-to-ceiling shelves, making it more whole.
Follow precautions when opening and closing the Murphy bed.
Pinching is a problem with a Murphy bed because of their movement. Open and close, keeping all limbs away from the Murphy bed. Furthermore, no one should stand under the Murphy bed while opening and shutting it should the bed assembly collapse and the hardware fail.
As a result:
Look at weight limitations. Take extreme care not to surpass the weight restrictions specified in your Murphy bed hardware kit. If no weight limit is specified, it will never exceed the mattress’s weight restriction.
Cut additional bedding as needed. If you have trouble closing your Murphy bed tightly, consider trimming excess bedding, including quilts, shams, and pillows. Since sheets usually express themselves, one can leave them on the mattress.
Related topics:
DIY grout cleaner
DIY dishwasher detergent